
For a 7 day free trial version please send me a message
MT4/MT5 To Discord Sender
MT4 To Discord Sender
MT5 To Discord Sender
MT4/MT5 To Discord Features
- Filter trades to send by Symbol or Magic Number
- Exclude Sending specific symbols
- Exclude sending specific magic numbers
- Fully Customise signal to your preference
- Customise which trade details to send with the signal
- Customise which signal types to send
- Send Daily, Weekly, Monthly and Custom time reports of the signal performance
- Send Screenshots with the signals
Getting Started
Create and Setup A Discord WebHook URL
- Open your Server Settings and head into the Integrations tab.
- Click the “Create Webhook” button to create a new webhook!
- Choose what channel the Webhook posts to: By selecting the desired text channel in the dropdown menu.
- Name your Webhook: Good for distinguishing multiple webhooks for multiple different services.
- Copy the Webhook URL and enter it in the EA interface or EA inputs.
- You can test the connection by selecting ‘Test Connection’. Check the Discord channel for the test message.
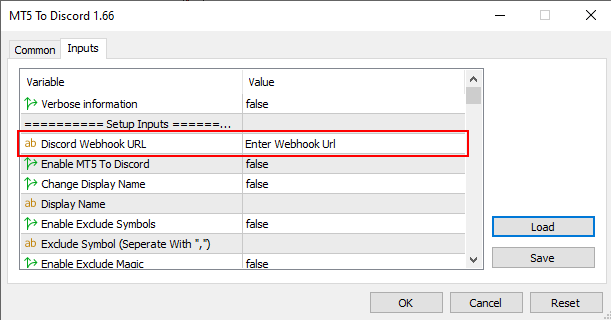
Enter the WebHook URL Into the EA inputs.

Enable MT4/MT5 To Discord
You must first enable the Sender by pressing the ‘Disable’ button and turn it into a green ‘Enabled' button on the bottom right of the panel
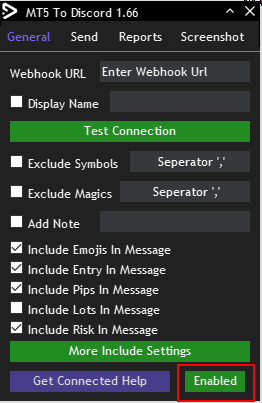
General Tab

- EA Tabs to change between General, Send, Reports and Screenshot settings
- Webhook URL for the Discord
- Username – Change the username displayed when the bot sends a signal
- Test Connection will use the Chat ID and Bot Token to send a test message to the channel. If successful then signals are ready to be sent
- Exclude Symbols – Choose which symbols to not send
- Exclude Magic – Choose which EA to not send signals from using the magic number
- Include a note or custom message at the bottom of all signals
- Choose what to include in the signal.
- More include settings to show more options on data to send with the signal
- Help on how to get connected
Send Tab
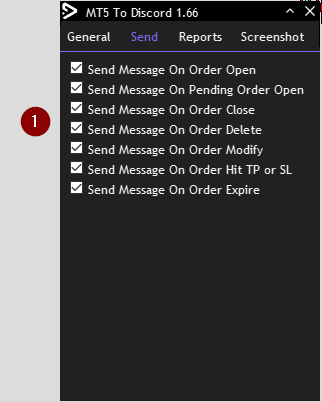
Choose when to send a signal. You can pick from 7 options which can trigger the signal
Reports Tab
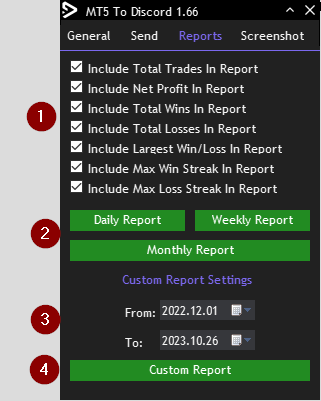
- Choose what data to include in the report
- Send daily, weekly or monthly report
- Choose a custom date for the data to send
- Custom Report – Send the data between the dates selected in step 3
Screenshot Tab
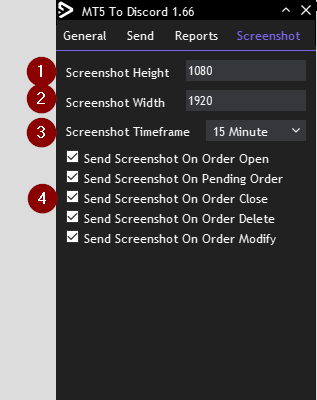
- Screenshot Height in Pixels
- Screenshot Width in Pixels
- Screenshot Timeframe
- When to send the screenshot. Select with actions trigger a screenshot
Comments are closed.