Hero EA implementation guide – Other – 16 August 2023
Hero EA implementation guide
In this document, we want to help you to implement this expert in the best way.
After installing the expert (according to the installation guide of the purchased products), we will see the following image:
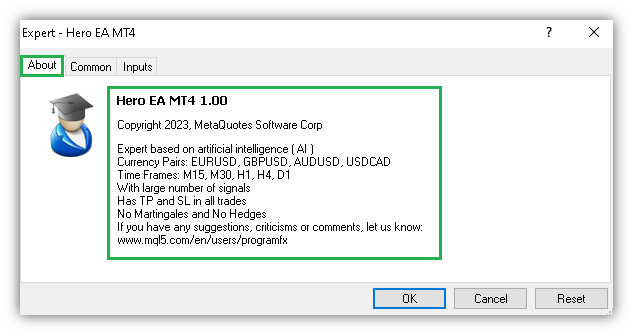
On this page, you can see the basic information of the expert.
This information shows that your product is original.
In the next tab (i.e. Common tab), we can allow the expert to trade.
So enter this tab and according to the figure, click the items shown so that the expert is allowed to trade.
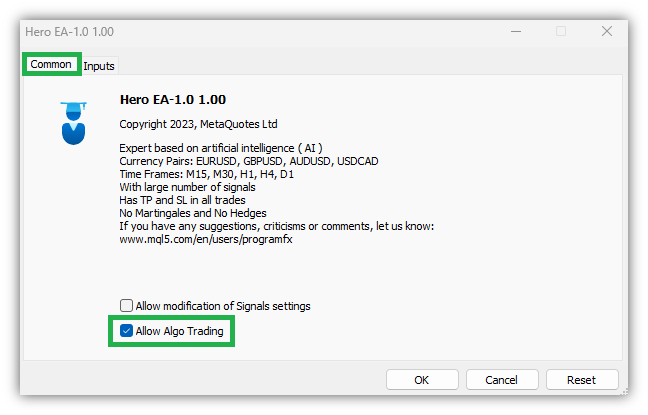
In Metatrader 5, the first and second pages are merged and are on one page.
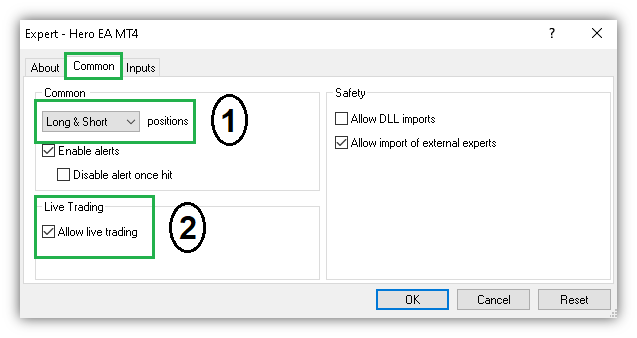
1- positions: Long & Short
2- Live Trading: Allow live trading ) Fill in the tick in this section, As in the figure above)
Metatrader 5:
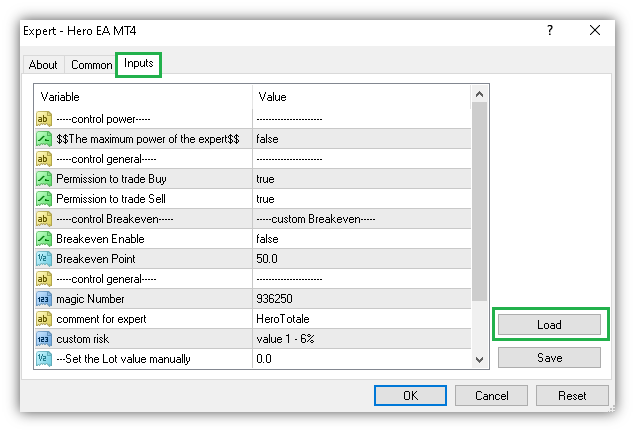
Then we enter the third tab, that is, the settings tab, to adjust the expert settings in the best way:
If you want to use the settings that we have placed on the site, first download those settings from the site (settings guide section-end of the page) and then on this expert settings page, click on the “Load” option and load those settings.
Settings guide page: https://www.mql5.com/en/blogs/post/753705
Settings file: (bottom of the page)
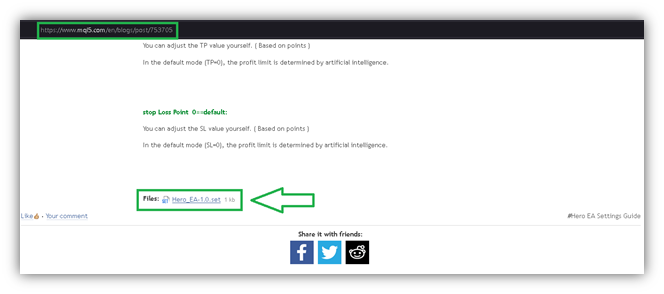
But in the end, it is better to change some settings based on your own conditions and experiences.
So read the settings guide file completely and find the best settings for yourself.
In the last step, we have to tell Metatrader that our expert can trade automatically.
So, according to the picture below, activate the “Auto Trading” option. (The upper part of Metatrader)

You have successfully run the Expert.
To make sure that the expert is allowed to trade or not, the icon on the top right of the chart should look like the picture below:
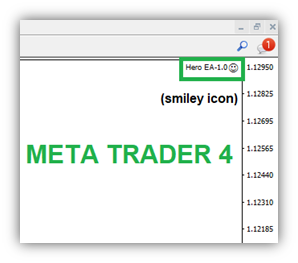
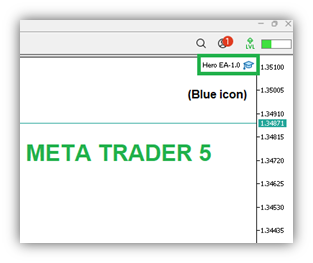
Good luck


Comments are closed.